RenderMan Shaders |
Fot this tutorial open the Maya scene, renderman_shader.ma.
(Where are the tutorial files?)
|
1 — THE MAYA SCENE |
In this tutorial we will take a look at using the RenderMan Shader node. Please note that writing RenderMan Shaders is not a “basic” skill and is beyond the scope of this tutorial. However, there are numerous resources available for RenderMan Shaders, as well as GUI-based tools, such as Pixar's Slim, included with the RenderMan Artist Tools, that can enable you to tap into the robust RenderMan Shading Language.
The RenderMan Shader node references compiled RenderMan shaders (.slo files). RenderMan for Maya includes the shader utility, shader, which allows you to compile shader source (.sl) files. Alternatively, a tool like Slim can create compiled shaders for you.
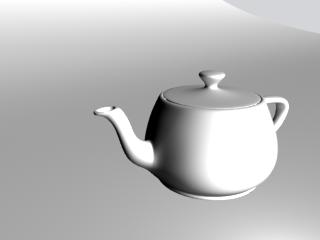
Open up the Maya scene, renderman_shader.ma. This scene is simple: the proverbial teapot, in a box. The scene should look something like this:
Maya Scene
|
2 — SHADER SOURCE |
We're going to use both raw .sl files and compiled shaders built with Slim in this exercise. These can be found in shaderexamples directory of the rfm_project. The shader source files are borrowed from The RenderMan Companion, a classic blue marble surface shader and a similarly timeless displacement shader. You can view the shading language code by opening these files (blue_marble.sl and dented.sl) with your favorite text editor. Here's the source for the “dented” displacement, just because:
	displacement
	dented (
		float Km = 1.0)
	{
		float size = 1.0,
		      magnitude = 0.0,
			  i;
		point P2;

		P2 = transform ("shader", P);
		for (i = 0; i < 6.0; i += 1.0) {
			magnitude += abs (.5 - noise (P2 * size)) / size;
			size *= 2.0;
		}
		P2 = P - normalize (N) * (magnitude * magnitude * magnitude)* Km;
		N = calculatenormal(P2);
	}
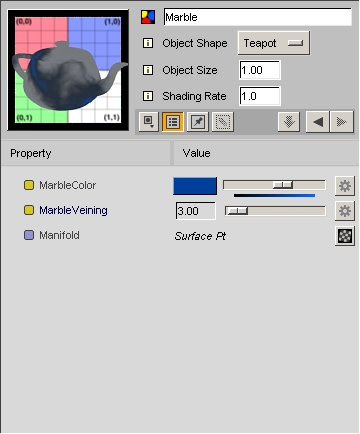
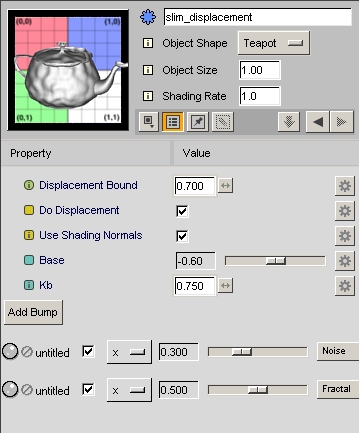
We've created a couple of Slim appearances that are rough approximations of these shaders. There is a simple diffuse appearance created using the Delux node, and a “Combine” displacement that uses a noise and a fractal function in combination. If you have the RenderMan Artist Tools you can take a look at the palette, in the shaderexamples directory. Whether you have RAT or not, here's a look at the appearances:
|
Marble by Slim |
Slim's Displacement |
Note that the widgets of the parameters that were marked as external are a nice shade of blue-green/aqua/teal (e.g. base and Kb. in the displacement shader; these parameters will be exposed in the RenderMan Shader node in Maya and can be further tweaked.
|
3 — COMPILING RENDERMAN SHADERS |
The first thing that needs to be done to accommodate the RenderMan Shader node is: compile your shader. RenderMan for Maya includes the shader utility; run off the command line, shader compiles shaders. If you're using Slim, Slim does the compiling for you, each time you click on the preview swatch.
To use the shader utility you will need to set an RMANTREE environment variable (unless you also have RenderMan Pro Server installed, in which case you should have it set already). Otherwise the RMANTREE variable should point to the rmantree directory in your RenderMan for Maya or RenderMan Studio installation whichever you have installed.
So, on the Mac:
On Windows:
If you look at the contents of the directory where the .sl files are, you will notice the presence of two new files, blue_marble.slo and dented.slo.
|
4 — USING RENDERMAN SHADERS |
As you might have guessed, given that we've been looking at a surface shader and a displacement shader, we're going to use two RenderMan Shader nodes in a single Shading Group. Go ahead and open Hypershade and click on the RenderMan Shader icon to create the first node. Click on the little folder icon next to the Shader field and browse to the compiled surface shader, blue_marble.slo. The Material Sample will update and the RenderMan Shader surface parameters will populate the Attribute Editor window. It will, in fact, look a little something like this:
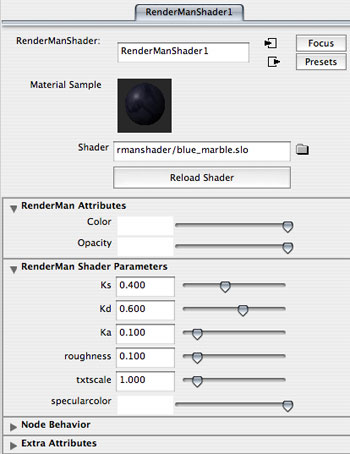
The RenderMan Shader Node
Having accomplished this singularly spectacular bit, we could stop, but let's go ahead and add our displacement to the shading group. Go ahead and back up to the Shading Group level, RenderManShader1SG. You'll note that RenderManShader1 is referenced in the Surface Material field. Click on the Displacement Material attachment widget to connect our second RenderMan Shader. With Maya, at this point you would probably select a Texture in the Create Render Node window, but Maya considers the RenderMan Shader a Material, although it can be a surface or a displacement. Click on the Materials tab and select the RenderMan Shader node. This will open RenderManShader2 in the Attribute Editor; browse to dented.slo to attach your displacement shader. Your Shading Group will end up looking like this:
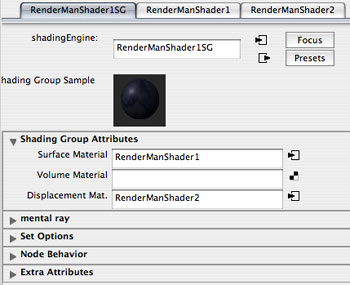
The RenderMan Shader Shading Group
Assign the Shading Group to the teapot and its lid, and…render!
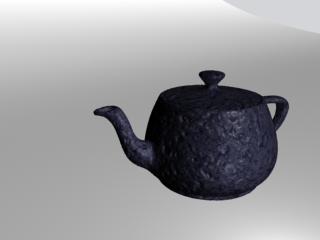
One Dented Marble Teapot
The same method applies for applying the shaders created with Slim. Open RenderManShader1 in the Attribute Editor again, click on the folder icon, and this time browse to the slim_marble.slo shader. What say we Tweak a parameter or two here? Note that the sliders adjust the values relative to the original values. Let's lower the Diffuse_Intensity a bit, say to 0.500, and increase the Specular_Intensity to 0.700-ish.
Now let's open RenderManShader2 and browse to the slim_displacement.slo shader. Let's bump the Kb up a bit, to 2.000 (Kb is a multiplier for the displacement), and let's lower the Base to -1.5. Render again.
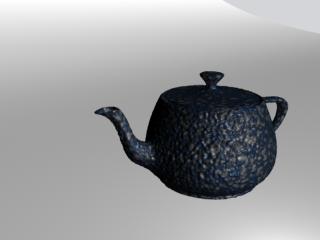
A Subtly Different Dented Marble Teapot
You can make subsequent changes to the source for your RenderMan Shader node. If you edit your .sl file by hand or tweak your Slim appearance, simply recompile the shader and then click the Reload Shader button in the corresponding RenderMan Shader node.
|
5 — SUMMARY |
Integrating your RenderMan shaders with your Maya scene is just about as easy as pie using RenderMan for Maya's RenderMan Shader node. The node can be assigned just like any other Maya material, and is little more than a matter of browsing to your compiled shaders, which maintain a nice degree of tweakability even after being imported.
In addition to building shaders with Slim, there is a vast number of sources for shaders, both in print and on the Internet. Here are a few hefty tomes worth a look-see:
- The RenderMan Companion: A Programmer's Guide to Realistic Computer Graphics
ISBN: 0201508680- Advanced RenderMan: Creating CGI for Motion Pictures
ISBN: 155860618- Rendering for Beginners: Image Synthesis Using Renderman
ISBN: 0240519353- Essential RenderMan fast
ISBN: 1852336080
|
Pixar Animation Studios
|