Prev |
Next
To get started, you'll want to open the appropriate file for the recipes.
(Where are the Maya files?)
Open the scene, /scenes/recipes/area_light.ma.
In this scene an area light is set up to cast soft shadows. The shadows are
ray traced and the area light has RenderMan Attributes attached to it to
control how
many ray samples the area light casts. More samples provide a higher quality
shadow. This scene uses 256 samples to cast an artifact-free shadow.

Area light with 256 ray traced shadow samples
Open the scene, /scenes/recipes/interior_occlusion.ma.
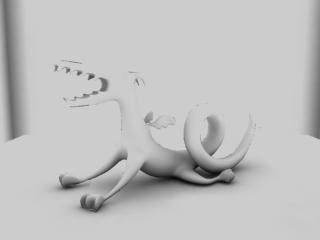
In this scene we have our dragon in a box, with a simple Lambert attached to all the
surfaces. The lighting is courtesy of a RenderMan Environment Light node. Straight out of
the box, the defaults have the Max Dist parameter set to 10000, which, as you can see, doesn't
get the job done:

Max Dist = 10000
For global illumination to work properly with interior scenes, you need to shorten the maximum
distance that rays are shot to compute occlusion, meaning that you need to stop well short of your
ceiling, or your scene will be fully occluded. In general, a good guideline for setting the Max
Dist parameter is one-tenth the distance from your ground plane to your ceiling. In this scene,
the ceiling is about 20 units from the ground plane, so we have set the Max Dist to 2.0, and, as
you can see, we get a much more useful result:

Max Dist = 2.0
Open the scene, /scenes/recipes/pure_occlusion.ma.
This scene outlines two ways to get a “pure” occlusion image, as seen in the
Global Illumination tutorial. The “correct” way
to get this so-called pure occlusion is to create an additional, secondary output for occlusion,
via the Passes tab of the Render Globals, as we have done here. This output, however, is the
actual occlusion data, as read and used by the renderer, and is the inverse of what you might
expect to see:

Actual “pure” occlusion
You can, however, then invert that image with the tool of your choice, such as fCheck, which
would give you this image, suitable for compositing:

Inverted occlusion
Or, you can “fake it” by using a simple Lambert shader with the color set to white
and the diffuse value cranked to 1, giving you the following image in your Final rendered image:

Faked “pure” occlusion
Prev |
Next
|
Pixar Animation Studios
Copyright©
Pixar. All rights reserved.
Pixar® and RenderMan® are registered trademarks of Pixar.
All other trademarks are the properties of their respective holders. |
