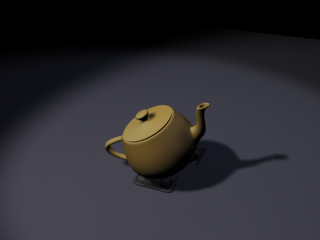
Render the Maya scene, fur_hair.ma, with RenderMan.
Render-> Render Current Frame
You should get an image like the one below:

A bald teapot
Fur and Hair |
To get started, let's open the Maya scene, fur_hair.ma.
(Where are the tutorial files?)
|
1 — WITHOUT FUR |
Render the Maya scene, fur_hair.ma, with RenderMan.
Render-> Render Current FrameYou should get an image like the one below:
A bald teapot
|
2 — ADDING FUR |
For this scene we'll use Maya's default Porcupine fur (found on the Maya shelf named, Fur). Attach the Porcupine fur to the part of the teapots named Scalp, which can be easily found in Maya's Outliner. The scalp geometry is the large part flat part of the teapot's lid.
When you've attached the fur, simply render again.
Render-> Render Current FrameYou should get an image with fur:
Teatpot with a head of hair
You may notice three things. First, setting up fur is easy (and RenderMan For Maya supports animated fur, too). Second, the fur is rendered in software … as little pieces of curved geometry (it isn't a post-process); by rendering fur in software mode we gain the benefit of this tight integration and, most importantly, we get proper anti-aliasing. Third, you'll notice that the shadow “bites”. The shadow is chunky and pixelated … this is a problem inherent in depth map shadows. Fortunately, RenderMan has something called Deep Shadows which have what it takes to get fur to cast nice-looking shadows. How? We'll attach one next.
|
3 — ADDING A DEEP SHADOW |
When rendering fur, Pixar's unique shadow map format, Deep Shadows, comes in handy. Deep Shadows are a special type of shadow map that can store transparency information and can also be filtered. In fact, Deep Shadows can even be motion blurred … these are things that you just cannot do with a traditional depth map shadow, and these are also things that are essential to creating acceptable shadows for fur.
The reason why we don't use Deep Shadows all the time is that they are more expensive than normal shadow maps. Unless you need the features of Deep Shadows, it's generally best to use regular shadow maps.
To create a Deep Shadow instead of a normal shadow map, simply add the RenderMan shadow attributes to the light that is casting the shadow. In this case the light is called key. To attach the attributes, follow these steps:
1) Select the light (in this case named "key").2) Open the light in the Attribute Editor.3) From the Attribute Editor Menu:Attributes-> RenderMan-> Add ShadowMap AttrsNow that you've added the shadow map attributes, they will appear at the bottom of the light shader under the Extra RenderMan Attributes tab. The shadow map attributes can be set to create Deep Shadows or normal depth maps. Since the attributes default to Deep Shadow mode, you can simply render the scene again:
Render-> Render Current FrameYou should get an image like the one below:
Fur with deep shadows
You can see that the fur with Deep Shadows is free of any chunky artifacts. This is especially important when animating fur. Chunky artifacts become very obvious. Using fur and Deep Shadows together is highly recommended indeed.
|
4 — ADDING MAYA HAIR |
The workflow for Maya Hair is exactly the same as it is for fur: create Maya hair, animate, tweak hair, and render. Remember, hair looks best with deep shadows, too.
RenderMan for Maya only provides complete support for Maya Hair beginning with Maya 6.5.
|
5 — SUMMARY |
RenderMan for Maya will render both Maya Fur and Maya Hair, including key-frame animation and dynamics. Since fur is rendered in software (and is not a post-process) RenderMan will create fur and hair that is properly motion blurred and anti-aliased.
For more information about fur see: Fur.
|
Pixar Animation Studios
|