Prev |
Next
Fot this tutorial open the Maya scene, dragon.ma.
(Where are the tutorial files?)
In this tutorial we will take a look at ray-traced reflections and refractions.
Most familiar ray tracing operations are easy to set up with RenderMan for Maya.
For instance, basic ray-traced reflections, refractions, and shadows can be
created using the standard Maya methods. Other advanced ray tracing effects,
like Global Illumination, require
special RenderMan workflows.
Open up the Maya scene, dragon.ma. This scene is simple, with a
subdivision surface dragon and a NURBS plane inside a polygonal “Cornell Box”,
a couple of Maya Materials, and a couple of lights. The scene should look something like
this:
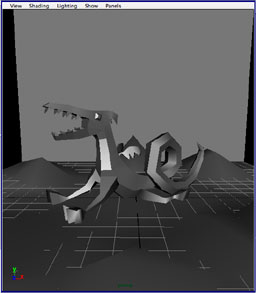
Maya Scene
First things first: if you look at the Maya materials and what they have been
attached to, you might notice that there's not much to reflect and/or refract
in this scene. That's easily fixed, of course. Select the “Grid”
material (it's just a Lambert) and let's map a simple image of a grid to the
color. The image is located in the sourceimages folder of the rfm_project
(~/rfm_project/sourceimages/grid.tif).
|
2 — RAY-TRACED REFLECTIONS
|
First we'll add ray-traced reflections to the model. The first step is enabling ray
tracing, which is done via the Render Globals. Open the Render Globals and select
the Features tab, then click the Ray
Tracing box in the Ray Tracing section to enable ray tracing.

RenderMan is a hybrid scanline
renderer which has an advanced ray tracing sub-system. Enabling ray-traced
effects requires more memory resources than pure scanline rendering.
Generally ray tracing should be used when these effects are absolutely
necessary and cannot be created (faked) in another way.
Next we'll create a ray-traced chrome material. Start by assigning a new Blinn to the dragon.
Set your Blinn color to something kinda chromey (or
brassy, depending on your metallic preferences). You can leave the specular settings at
their default levels, except the Reflectivity, which you should crank all the way up to
1.00. Some folks like to match the specular color to the material color, but we
wouldn't force your hand. Then pull back on the Diffuse, all the way, if you're so
inclined.
Render! Your rendered image should bear some resemblance to the image below:
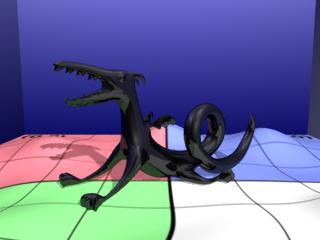
Ray-traced Reflections
That's the basic approach, but RenderMan for Maya provides some added control over your ray-traced
reflections. Go back to your Blinn in the Attribute Editor, then go to the Attributes menu and select
RenderMan-> Add Reflection Controls. This will create a new section of “Extra RenderMan
Attributes” that give you control over the quality and appearance of your reflections.
First thing we do, let's get in closer to get a better look at the reflections, then let's increase
the Reflection Samples to improve the overall quality of the ray-traced reflections. “6” seems like
as good a place to start as any. Rerender, and note the pleasant improvement in the image. Mmm, crispy …
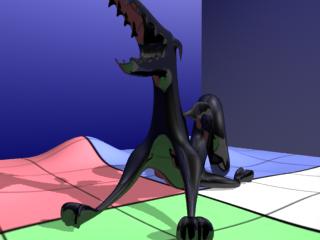
Ray-traced Reflections; Reflection Samples: 6
Perhaps, in fact, that's a bit too crisp for us. Luckily, we can play with the reflection blur, too.
Crank that Blur setting all the way to 1.000 and rerender. Those edges have softened up quite a bit now.
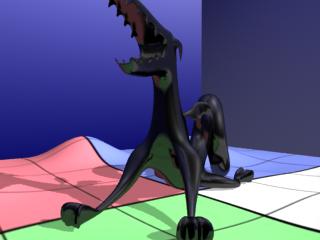
Ray-traced Reflections; Blur: 1
RenderMan for Maya also gives you two ways to limit what you see in your reflections: you can create a Maya
set and specify it, or you can manipulate the Reflection Max Dist parameter. Our scene's a bit simple to warrant
using a Maya set, but let's play with the Max Dist. It's set by default to something like a bazillion; let's lower
that to “2”, and rerender. Only elements of the scene within 2 units of our reflective surface will be
visible in our reflections, see:
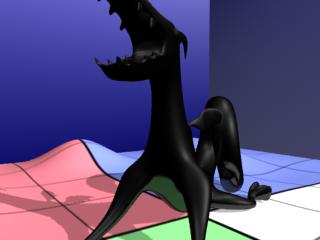
Ray-traced Reflections; Reflection Max Dist: 2
The blue from the Cornell Box is no longer visible, and we cannot see the grid at the higher points of the dragon.
|
3 —
RAY-TRACED REFRACTIONS
|
Light refracts through transparent surfaces, such as glass. Ray tracing allows you to re-create this effect with ease. In fact,
ray-traced refractions are just a couple of simple
tweaks to the Blinn material in the scene we've been working with.
First things first: let's reposition our camera to get a better view of the refractions, up and
to the right a bit, so that we're looking down at the grid, through the dragon.
Next, open the Attribute Editor for our Blinn. Typically we are told to change our Color attribute
to Black for a glass-like material, but we're also going to spike the Transparency, dragging
that slider all the way to the right, so go figure … For now, go ahead and drag the
Color slider all the way to the left and the Transparency slider all the way to the right.
In the Raytrace Options, check the Refractions checkbox, thereby enabling refractions.
In the “real world” glass has a refractive index 'round about 1.5, crystal 'round
about 2.0. For our purposes, a crystal dragon will do a slightly better job of showing off
the effect, so go ahead and increase the Refractive Index to 2.000. And, what the
heck, since we're splurging on crystal, we might as well make it heavy crystal —
go ahead crank the Surface Thickness up to 1.000.
Do that rendering thing again, and you should have something that looks like this:
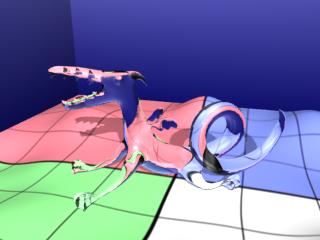
Ray-traced Refractions
Pretty neat, eh?
Once again, you can Add Refraction Controls the same way you added Reflection Controls. Feel free to play
with the various parameters to see their effect. Note the correlation between speed and quality, and
keep that in mind as you work on your own projects.
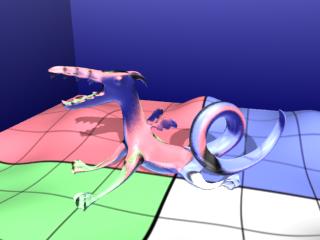
Ray-traced Refractions; Refraction Samples: 6 and Blur: 1
As we've seen in these two simple exercises, ray tracing with RenderMan for Maya is fast and
easy. Once you're comfortable, check out the RenderMan for Maya tutorial on
Global Illumination. Here's more information about
Reflections and Refractions.
Prev |
Next
|
Pixar Animation Studios
Copyright©
Pixar. All rights reserved.
Pixar® and RenderMan® are registered trademarks of Pixar.
All other trademarks are the properties of their respective holders. |


