Prev |
Next
To get started, let's open the Maya scene, motion_blur.ma.
(Where are the tutorial files?)
Open the scene, motion_blur.ma,
in Maya. For this tutorial we have around 2,000 teapots flying through the air.
Note that this was accomplished using Maya's Particle Instancing
feature, which RenderMan For Maya supports. Now 2,000 teapots is more teapots than
anyone really needs, but it will serve well as a little stress test for
RenderMan's motion blur.
First render the Maya scene
without motion blur. Make sure your renderer is set to RenderMan and run your particles up
to frame 35 or so, then render.
Render-> Render Current Frame
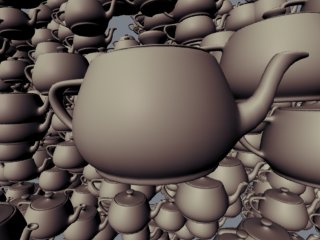
You should get an image like the
one below:

Flying teapots
(Rendering time:
12 seconds)
Motion blur would be a nice effect
to add to these high-velocity teapots. We can add motion blur by opening the
Render Globals and selecting the Features tab. Enable motion blur by
clicking the appropriate check box (next to Motion Blur). Now Render the Maya
scene:
Render-> Render Current Frame
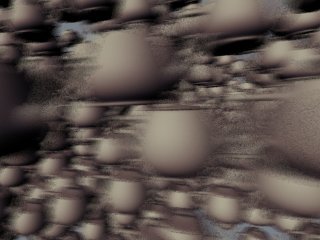
You should get an image like the
one below:

Motion blur
enabled
(Rendering time:
19 seconds)
An important motion blur control is
Shutter Angle. Shutter Angle controls how blurry the motion blur is
going to be. The default value is "80". A value of "360"
means that the shutter will be open the entire frame, creating very blurry
motion blur. A value of "1" means that the shutter will be open 1/360
of the frame, and there will be little noticeable blur at all.
For our image, we could use a
little more blurring. Increase the Shutter Angle to "180" and render
again.
Render-> Render Current Frame
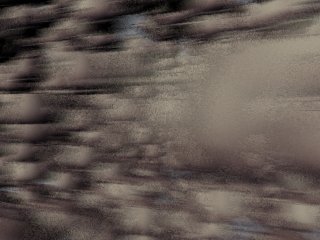
You should get an image like the
one below:

Motion blur with
a shutter angle of "180"
(Rendering time:
36 seconds)
|
4 —
ADJUSTING PIXEL SAMPLES |
Pixel Samples is the most important
setting when rendering motion blur, especially the extreme motion blur in this
example. In the images above the motion blur is rather “grainy”,
which is undesirable. By increasing the Pixel Samples we create smoother motion
blur. We can do this by opening the Render Globals and selecting the Quality
tab. The Pixel Samples setting defaults to 3x3. Increase the Pixel Samples to 8x8 (which
will cause RenderMan to sample each pixel many more times). Now render the
scene again:
Render-> Render Current Frame
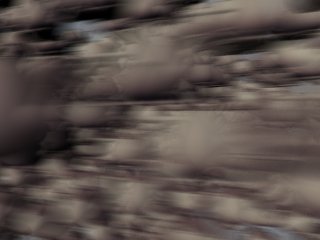
You should get an image with much
smoother blur:

Motion blur with Pixel Samples
of "8"
(Rendering time:
46 seconds)
RenderMan handles motion blur well, especially for large scenes with lots of
fast-moving objects. By increasing the Pixel Samples, higher quality blur can be
created, but, to avoid excessive render cycles, Pixel Samples should only be increased
as much as is required.
For more information about configuring motion blur see the Features
tab of the Render Globals.
Read more about Pixel Samples in the Quality
tab of the Render Globals.
Prev |
Next
|
Pixar Animation Studios
Copyright©
Pixar. All rights reserved.
Pixar® and RenderMan® are registered trademarks of Pixar.
All other trademarks are the properties of their respective holders. |
