|
||
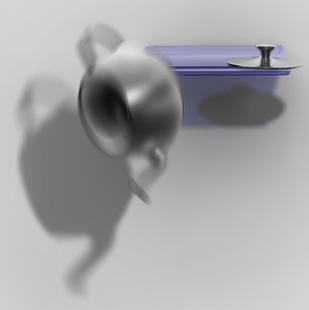
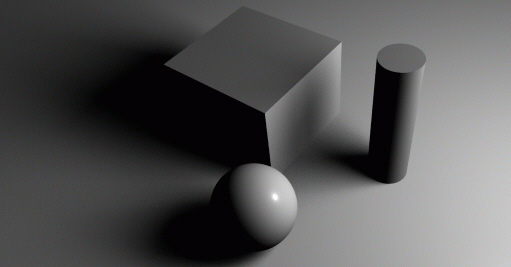
| Point Light Shadows Requires 6 Shadow Maps |
Directional Shadows Requires 1 Shadow Map |
Spot Light Shadows Requires 1 Shadow Map |
MTOR provides special machinery that allows the creation of Pre-Computed Maps during pre-passes. These passes are called pre-computed maps since they are generated as separate passes before the final rendering. Pre-computed maps can be used to create anything from shadow maps, depth maps, reference maps, or ambient occlusion maps. Pre-computed maps can be used in numerous ways, referenced by shaders during a final pass to create shadows, reflections, or other effects . . . often much more efficiently than the alternative of raytracing.
MTOR gives a high degree of control over what kind of pre-computed maps can be generated, and, in addition, to how those maps may be used in the final image. For animations, pre-computed maps may have to be generated every frame (or only once if the objects in the map don't move from frame to frame). MTOR provides complete control over the generation of a number of different kinds of pre-computed maps:
Types Of Pre-Computed Maps
The mechanism for creating pre-computed maps is built into a variety of Slim nodes. The Shadow Map node is a good example. The Shadow Map node is used to both control the generation of a pre-computed shadow map as well as to reference the shadow map. Nodes like the Shadow Map node can be wired into complicated Slim shading networks.
Additionally, Map Generators can be created for the generation of pre-computed maps. These Map Generators are not built into shading networks. They are simply attached to objects for generating maps.
Depth Map Shadows are used to create shadows, fast and efficiently. Depth map shadows do not support motion blur or semi-transparency. Those effects require Deep Shadow Maps. However, when those effects aren't needed, Depth shadow maps are an effcient solution.
Slim Light Shaders
You can acheive more control over shadow effects by attaching a special
light shader. In
these cases, you can simply attach a Slim
Light Shader to your scene light. Controls for Compute
Frequency, Objects in Map, and Map Resolution are all
present in Slim's Shadow Map
template.
Creative Effect
Different types of lights cast different types of shadows, which can be used
to create various types of moods and settings. Be sure to attach the appropriate
Slim light shader to the scene light. Here are some examples of shadows created by each type of
light:

|
||
| Point Light Shadows Requires 6 Shadow Maps |
Directional Shadows Requires 1 Shadow Map |
Spot Light Shadows Requires 1 Shadow Map |
BASIC SET UP
- Create a Slim Light Shader and attach it to a Maya light.
- Connect a Shadow Map to the light shader's Shadow parameter. (The default settings of Slim's Shadow Map template are set to create shadows.)
- Render.
Try out the Shadow Map map tutorial.
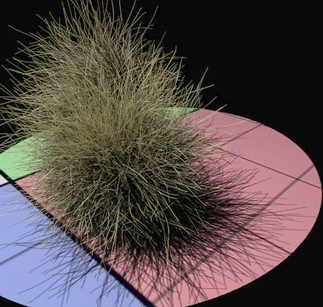
Pixar's deep shadows are an advanced type of shadow map that support semi-transparency, colored shadows, motion-blurred shadows, and pre-filtering. Deep Shadows can easily create effects that are nearly impossible with normal depth maps, and deep shadows often avoid the biasing artifacts endemic to normal depth map shadows. Deep shadows are also cheaper than the alternative of ray tracing the effects.
 |
 |
| Deep Shadows Good for motion blur and colored shadows |
Deep Shadows Pre-filtering is ideal for rendering fur |
BASIC SET UP
- Create a Slim Light Shader and attach it to a Maya light.
- Connect a Shadow Map to the light shader's Shadow parameter. (The default settings of Slim's Shadow Map template are set to create shadows.)
- Change the Shadow Map's Shadow Type parameter to Deep Shadow.
- Render.
For more information see: Deep Shadows.
Pixar's RenderMan supports an implementation of soft shadow maps. This method entails the rendering of multiple shadow maps from slightly different positions for a single lightsource. These shadow maps are averaged together to create the effect of an area light.

Soft Shadow Maps
Soft shadows create very convincing effect, but remember they are much slower than
a single shadow map. This technique should be compared to the alternatives
of either Blurring Ray
Traced Shadows or creating Pseudo-Area Lights.
There are a number of ways to generate soft shadows.
BASIC SET UP
- Create a Slim Light Shader and attach it to a Maya light.
- Connect a Slim Soft Shadow Map to the light shader's Shadow parameter.
- Render.
For more
information about how to configure soft shadows, refer to the Soft
Shadows Tutorial.
Reflection maps are used to create reflections on flat objects. Use reflection mapping when you have a shiny flat surface upon which you want nearby objects reflected. The reflection mapping technique requires only one additional rendering pass, but this pass can be as expensive as the final rendering because it requires that objects be fully lit and shaded.
Here are some things to keep in mind about the reflection mapping technique:

BASIC SETUP
- Create an AdditiveFX node.
- Plug a base shadingmodel into AddtiveFX, like Blinn.
- Plug an instance of Reflection Map into the ch1 parameter of AddtiveFX.
- Cause the creation of a reflection map by setting the Frequency parameter of ReflectionMap to Every Frame.
- Add a reference to the new reflection map in the Reflection Map parameter of ReflectionMap function:
[refmap $OBJNAME].- Attach the AddtiveFX shader to the ground plane and make sure that the ground plane doesn't cast reflections. In Maya there's a per object render stat that controls this.
Try out the Reflection map tutorial.
Environment maps compute reflections for spherical-type objects in a scene. Environment maps are expensive, requiring 6 reflection maps.
A major limitation of environment mapping should be kept in mind: this technique assumes that the surface of the shiny object is spherical. As your surface departs from this canonical shape, the reflections will be less accurate (though often still convincing). This distortion will be less obtrusive as the reflected objects get farther from the reflective surface. In other words, local (nearby) objects will be inaccurately represented while distant ones will be correct. In CG, often no more than the impression of reflectivity is required. In this case, environment maps or the nifty planar raytracing shader are good techniques.

BASIC SETUP
- First we create an instance of AdditiveFX and choose the base shading model.
- Connect an Environment Map node to ch1.
- Set the Frequency parameter of Environment Map to Every Frame.
- Add a reference to the new reflection map in the Reflection Map parameter of Environment Map function:
[refmap $OBJNAME].- Attach the AddtiveFX shader to an object.
- Render. Make sure that the object doesn't cast reflections (we don't want that in the reflection). In Maya there's a per object render stat that controls this.
Try out the Environment map tutorial. Procedural environments, like this Glass Example can often be convincing as well.
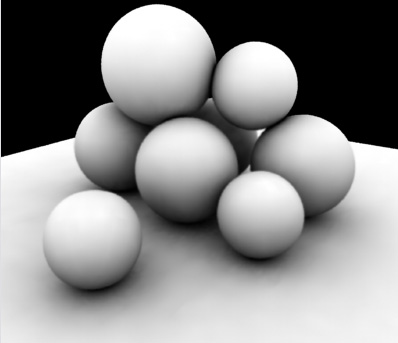
Occlusion Map Generators can create ambient occlusion effects automatically, much like a shadow map or reflection map. The occlusion map generator allows the creation of a 3D occlusion cache (.ocf) and/or 2D texture map data. The 2D texture is calculated as a pre-pass from the postion of the camera for any given frame. After the texture is generated, shaders may reference this pre-calculated 2D texture with the new Occlusion Map template. The texture is referenced in "NDC" space, from the postion of the camera. Alternatively, these occlusion textures can be composited later, providing extra workflow.
The Ambient Occlusion Pre-Pass
|
|
+ |
|
|
|
||
BASIC SETUP
- First create an Occlusion Map Generator in a Slim palette.
File-> Create Appearance-> MapGen-> Occlusion- Attach the map generator to the scene camera in Maya.
An occlusion pre-pass will now happen automatically.- Use Slim's Occlusion Map node to reference the occlusion map in any desired shader network.
For a simple example, wire the occlusion map into the color parameter of a constant shader and attach it to all the objects in a scene.- After the occlusion map is wired into a Slim network, explicitly set the name of the 2D texture generated by the Occlusion Map Generator.
The filename will change depending on the camera and the display name in the render globals but it will generally conform to "untitled.perspShape.ocf.0012.ocf"- Render.
- Hint: If you want to keep the textures around for later use, turn off Texture Cleanup in the RenderMan Globals.
BONUS MAYA EXAMPLE
This Maya file shows a basic setup for occlusion maps. This should be a good starting place. The scene file is here: /mtor/scenes/rays/occlusion_map.ma (All of the tutorial files for the RenderMan Artist Tools are located here.

Check out occlusion mapping in this simple Maya scene
Reference images can be a useful tool for creating many different kinds special effects. Use them to take an arbitrary image of a scene, from any postion. By attaching the Map Generator to the scene camera and referencing the texture in "NDC" space, from the postion of the camera, many special effects can be created.
BASIC SETUP
|
Pixar Animation Studios
|