Prev |
Next
 Adding
shadows is one of the most effective ways of adding realism to a
computer-generated image. The human visual system uses shadows to determine
depth, light location, and direction, as well as spatial relationships between
objects. Additionally, shadows are invaluable for creating moods and motivating
the emotion of an image or scene.
There are several types of shadows available with Pixar's
RenderMan: depth map shadows, deep shadows, or ray-traced shadows. Each method has it
own advantages. Shadow maps offer efficient shadow generation and a reusable
resource. Deep Shadows are a feature-rich shadow map that combine the benefits
of shadow maps with support for semi-transparent and motioned-blurred shadows.
Ray-traced shadows offer greater ease of use, more features, and higher quality,
but at the price of slower execution speed. What follows is a discussion of these
three formats.
top
The basic idea behind shadow maps is
simple. For each light that casts a shadow, a shadow map image must be rendered
during a pre-pass. Each shadow map is rendered from the location of its
respective light source. As an external resource, shadow maps can be reused, if
light and object positions do not change. There are three types of shadow maps:
depth maps, deep shadows, and soft shadows. All types generate shadow maps, but
have their own features, as outlined below.
Overview
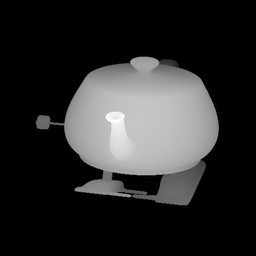 Depth map shadows produce good results in many situations. They are
efficient but have a number of limitations (as outlined below). The basic idea is
simple. For each light that casts a shadow, a shadow map image must be rendered
during a pre-pass. Each shadow map is rendered from the location of its
respective light source. The final result is shown in the image below. Each type
of light creates distinctly characteristic shadows.
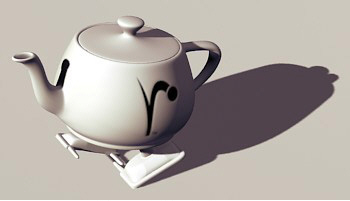
The image on the right is a depth map for the image of the teapot at the top of
the page. This depth map was generated as a pre-pass before the final image was
rendered. A depth map represents the distance from a specific light to the surfaces the
light illuminates. A depth map contains depth info from a light's point of view. Each pixel in the depth map represents
the distance from the light to the nearest shadow casting surface in a specific
direction.
Limitations
Depth shadows have some limitations, which also make depth map shadows
efficient by requiring less work on their part. As long as your shadows do not require the
following effects, depth map shadows may suffice.
- Depth Map Limitations
- No support for motion blur
- No support for transparent surfaces
- No filtering
Set Up
The simplest way to get depth map shadows with RenderMan for Maya is to
create a spot, point, or directional light in your scene. RenderMan for Maya
will automatically generate shadow maps when Depth Map Shadows are enabled on a
light. RenderMan uses the settings in the Render Globals as defaults for the
depth map, these can be overridden on a per-light basis. Here's the number of
depth maps required for each light source type:
- Spot Light - 1 map
- Point Light - 6 maps
- Directional Light - 1 map

Shadow Map Knobs
In the Render Globals Passes
tab, you're able to configure the settings of your shadow maps. Here are some of
the settings that are often configured on a shot by shot basis:
- Phase — Controls how often you want to compute
your shadow map. Usually you should choose "Every Frame" but if
you know that the map's contents are invariant over a sequence, choose
"Once Per Job."
- Shading Rate — Controls the shading quality for your shadow map; lower numbers
provide higher quality images.
- Pixel Samples — The number of samples to take of the map. Use larger
numbers when you need smooth blurring effects.
- Ray Tracing — Ray tracing can be disabled explicitly for shadow passes.
- Depth Filter — The algorithm for calculating shadow
maps.
- Expand checkboxes — Enables or disables Surface, Displacement, Light, and Volume shaders in
the shadow map pass.
top
Overview
Deep Shadows are a feature rich depth map shadow that support transparency and volumetric data. Deep shadows can
also be pre-sampled.
|
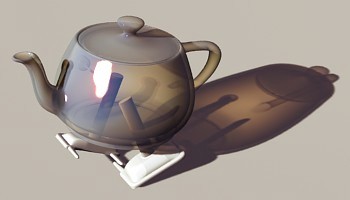
Deep
Shadows with semi-transparent shadows
|
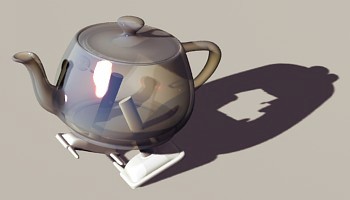
Same image
rendered with Depth Map Shadows.
The
inferiority of the Depth Map Shadow is clear.
|
Deep Shadow Benefits
Deep Shadows have the following advantages over traditional depth map shadows,
advantages that
make deep shadows ideal for fur, or when shadowing any collection of small,
semi-transparent objects.
Deep Shadow Features:
- Semi-transparent shadows
- Colored shadows
- Motion-blurred shadows
- Multi-sampling
- Far fewer animation artifacts than standard shadow maps
- Subtler, better-looking shadows than depth maps
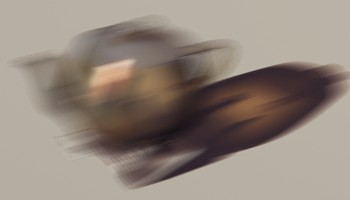
Motion
blurred teapot and shadows
Deep Shadow Cons
If deep shadows have a fault, it is that they store more data than standard
shadow maps. This means larger files and increased render times. Deep Shadows
should be used only when their benefits are useful and are not a replacement
for traditional depth maps in general. Note however that by pre-filtering a
deep shadow map a shadow map can be generated at a lower resolution than would
be required by a traditional shadow map, which can mean that in some instances a
lower resolution deep shadow map will render faster and require less disk space
than an equivalent standard shadow map generated at a necessarily higher
resolution.
Deep Shadows Vs. Ray Tracing
Deep Shadows can create many effects that could be also be created via ray
tracing. Creating these effects with deep shadows is generally much faster and
more efficient than generating the same effect with ray tracing.
For more information see the Deep
Shadow Tutorial.
top
 Overview
Light sources can ray trace shadows, and ray-traced shadows have several
features that traditional depth map shadows lack. Traced shadows can be used to
create soft shadows, colored shadows, and motion-blurred shadows. They are also
resolution independent, unlike shadow maps. Ray-traced shadows, however, can be
costly to render.
Ray traced shadows offer these effects:
- Semi-transparent shadows
- Colored shadows
- Motion-blurred shadows
- Soft shadows
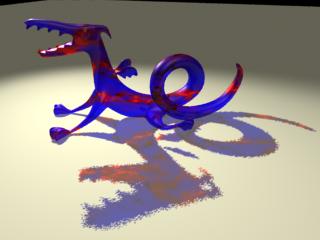
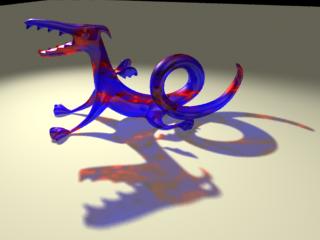
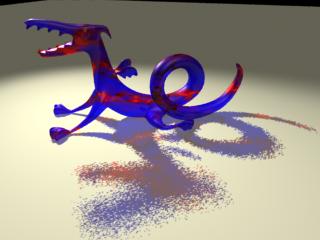
Blurred Shadows
Ray-traced shadows can create soft shadows. To create soft shadows just increase
the amount of by increasing the Light Angle. The higher the value, the greater the blur (see
images below). Blurred shadows usually demand a corresponding increase of the
shadow "samples" ()to eliminate "dotty" artifacts.
Ray-Traced Shadow Knobs
- Shadow Rays — The number of rays cast. More rays allow you to
achieve higher quality shadows (see images below). More rays also means
slower rendering.
- Light Angle — Controls the blurriness of your shadows.
Increase the number of Shadow Rays to reduce noise.
- Bias — The bias value for ray-traced shadows is controlled via
the Trace Bias parameter in the Ray Tracing section of the Features tab in the Render
Globals. Adjusting this parameter affects shadow creep. If it is too low the
shadows will creep onto the front of objects. If it is too high the shadows
will creep away from the bases. The size of objects, in world coordinates,
affects the ideal value for this setting and must be adjusted on a per scene
basis.
| Ray-Traced Shadow Examples |
|

Light Radius 0.25 ~ Shadow Rays 1
|

Light Radius 0.25 ~ Shadow Rays 24
|
|

Light Radius 1.0 ~ Shadow Rays 1
|

Light Radius 1.0 ~ Shadow Rays 24
|
top
Prev |
Next
|
Pixar Animation Studios
Copyright©
Pixar. All rights reserved.
Pixar® and RenderMan® are registered trademarks of Pixar.
All other trademarks are the properties of their respective holders. |
 Adding
shadows is one of the most effective ways of adding realism to a
computer-generated image. The human visual system uses shadows to determine
depth, light location, and direction, as well as spatial relationships between
objects. Additionally, shadows are invaluable for creating moods and motivating
the emotion of an image or scene.
 Depth map shadows produce good results in many situations. They are
efficient but have a number of limitations (as outlined below). The basic idea is
simple. For each light that casts a shadow, a shadow map image must be rendered
during a pre-pass. Each shadow map is rendered from the location of its
respective light source. The final result is shown in the image below. Each type
of light creates distinctly characteristic shadows.


 Overview