Prev |
Next
To get started, let's open the Maya scene, depth_of_field.ma.
(Where are the tutorial files?)
Open the scene, depth_of_field.ma,
in Maya. For this tutorial we have numerous stacks of boxes piled up around
the scene. We will use depth of field to create a focal point for the scene.
RenderMan uses an advanced 3D depth of field that is quite accurate.
RenderMan's depth of field is not a post-process effect. Expect
RenderMan to give you depth of field that has accurate anti-aliasing and placement.
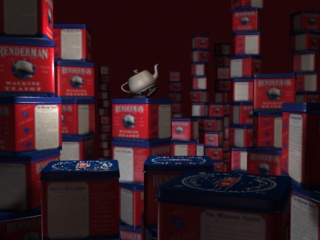
First render the Maya scene
without depth of field. Make sure your renderer is set to RenderMan.
Render-> Render Current Frame
You should get an image like the
one below:

Stacks of boxes
(Rendering time:
9 seconds)
|
2 —
ENABLING DEPTH OF FIELD |
Next we'll enable depth of field. We can
enable depth of field simply by using Maya's depth of field controls. Just open the
main camera in the Attribute Editor and enable the effect by clicking on the Depth
of Field check-box. Now Render the Maya
scene:
Render-> Render Current Frame
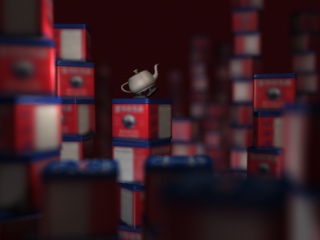
You should get an image like the
one below:

Depth of field enabled
(Rendering time:
19 seconds)
|
3 —
ADJUSTING PIXEL SAMPLES |
For RenderMan, Pixel Samples is the most important
quality setting for depth of field, especially extremely blurry
depth of field. In the image above the depth of field is rather “grainy”,
which is undesirable. By increasing the pixel samples we can create a smoother
effect. We can increase Pixel Samples by opening the Render Globals and selecting the Quality
tab. The Pixel Samples setting defaults to 3x3. Increase the Pixel Samples to
12x12 (which
will cause RenderMan to sample each pixel many more times). Now render the
scene again:
Render-> Render Current Frame
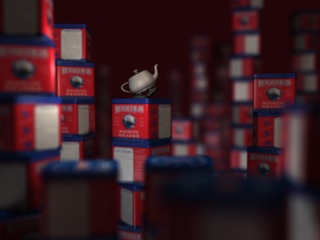
You should get an image with much
smoother depth of field:

Depth of field with Pixel Samples
of "12x12"
(Rendering time:
27 seconds)
|
4 —
ADJUSTING MOTION FACTOR |
Motion Factor is a control
used to render motion blurred objects more efficiently. Motion factor uses a
lower quality shading rate on motion blurred objects, assuming (correctly)
that if stuff is moving, it needs less detail. Motion blur and depth of field,
however, are computed in very similar ways, and, in fact, motion factor affects objects
with depth of field, too. In this case, we don't want any motion factor
optimizations. To fix this, we'll set motion factor to "0" and the
textures on the boxes will retain their detail. To set motion factor to zero,
open the Features tab of the Render Globals and set Motion Factor to
"0". Now render the
scene again:
Render-> Render Current Frame
You should get an image with more
detail in the textures. You'll notice the text is clearer:

Depth of field with
Motion Factor of "0"
(Rendering time:
41 seconds)
In certain cases you'll combine motion blur and depth of field in the same
scene. In these cases some (stationary) objects require a Motion Factor of zero,
while other (fast moving) objects can benefit from a higher Motion Factor. In
such situations you may explicitly add the Motion Factor attribute to individual
surfaces, so any surface can have its own Motion Factor setting. To add
attributes, select the surface and add the Motion Factor attribute from Maya's
attribute editor.
       1) Attribute Editor: Attributes-> RenderMan-> Manage Attributes
       2) In the pop-up window, select and add motion factor.
       3) Motion factor will now appear under the Extra RenderMan Attributes sub-tab, ready for adjustment.
RenderMan renders true 3D depth of field, which ensures correct anti-aliasing
and positioning of the depth of field effect. It is not a post-process effect. By increasing the Pixel Samples, higher quality
depth of field can be
created, but, to avoid excessive render cycles, Pixel Samples should only be increased
as much as is required.
For more information about configuring motion blur see the Features
tab of the Render Globals.
Read more about Pixel Samples in the Quality
tab of the Render Globals.
Prev |
Next
|
Pixar Animation Studios
Copyright©
Pixar. All rights reserved.
Pixar® and RenderMan® are registered trademarks of Pixar.
All other trademarks are the properties of their respective holders. |
