About Slim
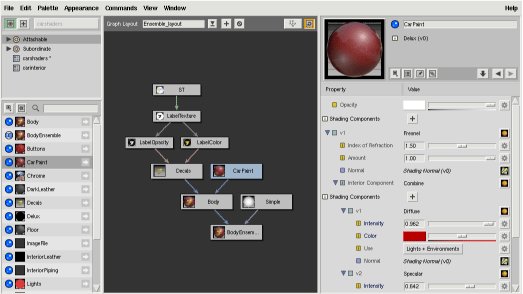
Slim is a powerful, extensible tool for creating, manipulating, using, and reusing RenderMan shaders, bringing the power of RenderMan shaders into the hands of artists. Users can construct RenderMan shaders by interactively combining modules into networks, editing their parameters, and previewing the results, all without writing any code.
Slim can be invoked in two different modes: client (via the Maya UI) or standalone (via the command line our your programs/applications menu). Whereas Slim is found on the RenderMan menu in the RenderMan Artist Tools, in RenderMan Studio you access Slim via Maya's Window menu; go to Window -> Rendering Editors -> RenderMan -> Slim... to open the completely redesigned Slim UI.

|
|
Slim's basic workflow is quite simple:
- From the File menu, choose New Palette to start from scratch, or Open Palette
to select an existing Slim palette.
- Click on the “+” icon to switch from the Browse to the Create mode.
- Choose an appearance from the Palette View, an icon
representing this primary node for your Slim network will be displayed in the
Network View, and the appearance and its parameters will
show up in the Appearance View.
- Tweak your appearance as you see fit. Note that by setting parameters to External you will be
able to continue tweaking after adding the appearance to your Maya scene. Click on the swatch to compile
the shader.
- To add your Slim appearance to your Maya scene, go to the Appearance menu and select
Add To Scene. You can then attach the appearance to an object in Maya from Maya's
Lighting/Shading menu; it has been added to your “existing materials”, so attaching
it is a matter of selecting your object and choosing if from the Assign Existing Material list.
For a complete rundown of Slim, please consult the Slim documentation.
|
