Prev |
Next
The Palette View is where you will manage palettes and packages. It allows
you to quickly see the contents of each palette in your session, and,
when using smart palettes, to navigate
and refine lists of all active appearances.
The Palette View is also a creation tool. When placed in
Create Mode, the palette view allows you
to navigate the templates that you can use to create new appearances.
|
The Palette View consists of two sections. The top section displays
a hierarchical list of active palettes, subpalettes, and packages. The
bottom section displays the contents of the selected palette.
Here is a quick survey of the pieces that make up the Palete View:
- Palette Listing Controls
These control the Palette View Mode
and Current Palette.
- Palette List
The list of active palettes, subpalettes,
smart palettes, and
packages.
- Content Listing Controls
These include a control over the size of thumbnails,
a toggle for sorting alphabetically, and a field to
use to filter the contents by name.
- Palette Contents
Contents of the selected palette.
|

|
Browsing Palettes
By default, the Palette View is in Browse mode, enabling you
to browse the existing appearances in your palettes. Selecting an
appearance displays the network for the shader(s) it affects
in the Network View, and
displays parameters and other details in the
Appearance View.
Each time you select an appearance, the Network View will update
to show the graph layout containing that appearance. To add an
appearance to the current graph layout, use the arrow button to
the right of the appearance listing.
Current Palette
Working with multiple palette files presents some ambiguity when it
comes to operations like Save and Close. For this reason, the
Current Palette is always displayed at the top of the Palette View,
within the Palette Listing Controls.
The Current Palette is updated whenever you select a palette file
in the Palette Listing. Also, whenever you select an appearance, the
palette containing that appearance is set to be the Current Palette.
Browsing with Smart Palettes
Often, rather than seeing all of the appearances within a file,
you will instead wish to see all of the appearances (in all palette files),
that share a common quality (such as attachment type). Smart Palettes
provide this capability.
|
Listed above your palette files are your current set of smart
palettes. Select a Smart Palette, and it will display all of the
appearances that meet that smart palette's configured criteria.
Smart Palettes can be nested, which provides for refinement
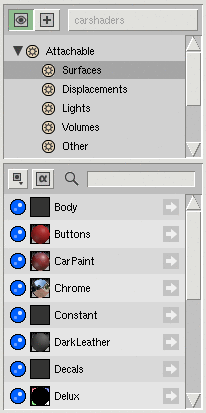
within criteria. Select the Attachable Smart Palette, and
all appearances that can be attached to geometry will be displayed.
Select the Surfaces Smart Palette (shown on the right), and
the list of appearances will be refined to only those appearances
that make attachments of type "surface."
The set of session-wide Smart Palettes are saved as preferences and
can be reconfigued and rearranged. For more information, refer to
the Smart Palettes documentation.
|

|
Filtering Contents
|
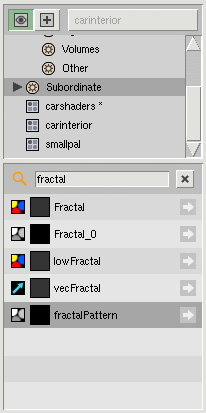
You can quickly filter the appearances displayed by their
label using the Filter filed in the Content Listing Controls.
To filter contents, simply start typing in the entry field.
The contents will update for each key you press.
Tip #1: You can access this filter at any time using the
forward-slash key: /
Tip #2: You can clear the filter using the Escape key
|

|
Create Mode
|
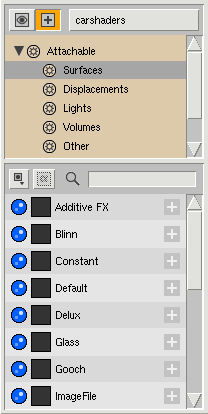
To create new
appearances, place the Palette View in Create mode by pressing
the + button in the Palette Listing Controls section. To remind
you that you're in Create mode, the Palette Listing will adopt an
orange background.
Now, the smart palettes in the palette listing can be used to navigate
templates rather than loaded appearances. They work in the same
way: select the Surfaces smart palette and you'll see the list
of templates that create Surface appearances.
In Create mode, the Current Palette
indicator becomes a pulldown menu. Use it to select the destination
palette for the appearances you create.
To instantiate a template, simply select it. Selecting an appearance will
add it to the current graph layout. Using the template icon's + button, however, will create a new layout in the Graph View for the appearance.

As in Browse mode, you can quickly find a template
by using the Filter field.

You can quickly toggle between Browse and Create mode using the backtick key: ` (also known as a “grave accent”).
|

|
Prev |
Next
|
Pixar Animation Studios
Copyright©
Pixar. All rights reserved.
Pixar® and RenderMan® are registered trademarks of Pixar.
All other trademarks are the properties of their respective holders. |


